I am often asked about prototyping and the use of this technology in ceramics. Here I will share that information for your personal research. I will continue to develop these links as time permits. There are three steps to 3D printing that I will outline:
Step 1: Design
Rhino – The dominant software that I use to create 3D forms in the computer is Rhino. This is a licenced software and has the ability to purchase educational licenses. There is somewhat of a learning curve, but plenty of online information.
Step 2: Slice
Cura – Cura is a slicer. Once a model is created in Rhino, it is exported as an .stl file and imported to Cura. While Rhino creates a solid model, Cura separates that model in to “slices” or layers and the output is what we call gcode. The gcode includes all of the temperatures, tool paths, etc. for the printer to output the part.
Step 3: Print
Octoprint – I then send the file that I have created to Octoprint which runs on a RaspberryPi (RPi). The RPi is a fully functional computer that fits in your hand. Octoprint controls the printer. The advantage to doing it this way is that you don’t have to keep your computer connected to the printer for the entirety of the print. Printing can take in excess of 14 hours!
Makrbot – I use a Makrbot 3D printer. Unfortunately, this printer is no longer manufactured.
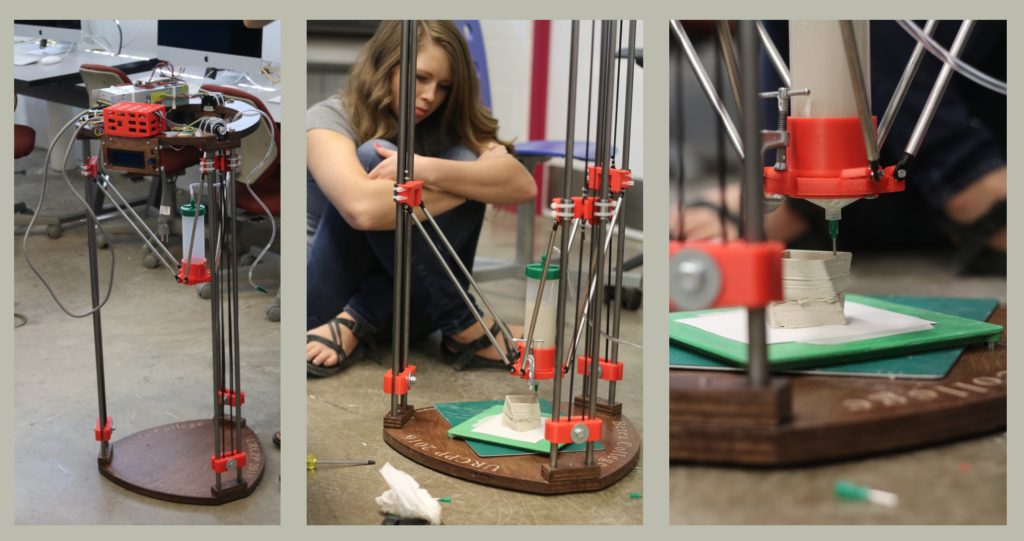
Delta 3D Printer for Ceramics – The ceramic Delta Printer. This printer requires purchasing the necessary parts and building the printer. The printer can be constructed for less that $600 and will directly print clay based on the form created in Rhino and Sliced with Cura.